> For the complete documentation index, see [llms.txt](https://mobsted-2.gitbook.io/knowledge-base/llms.txt). Markdown versions of documentation pages are available by appending `.md` to page URLs; this page is available as [Markdown](https://mobsted-2.gitbook.io/knowledge-base/messengers/intro-placeholder/set_up_vk_bot.md).
# Set up VK bot
 Updated 2 weeks ago by Mobsted Support L
To create and manage VK bots, you must have a Community created (group, event or public page).
1\) Go to ;
2\) Go to your community (if you do not already have a Community, then create it, go to the Groups section for this);
3\) In the community settings (section Manage) select "Messages";
4\) Enable Community messages;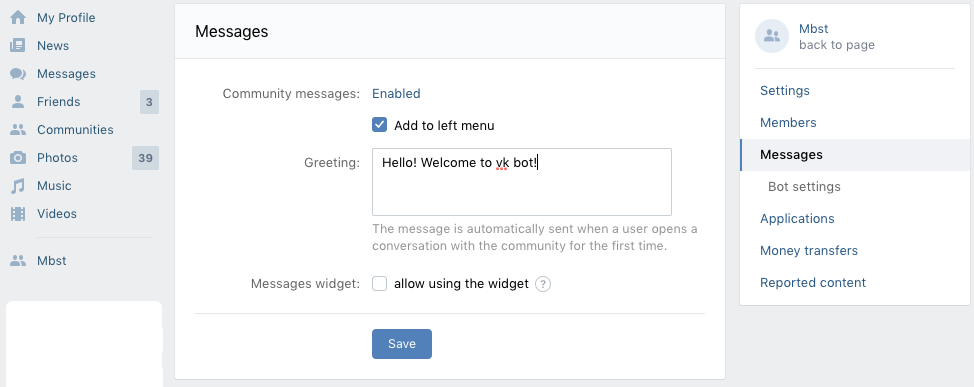
5\) Using the “Add to the left menu” setting you can add your VK-bot to the left menu of your Community;
6\) In the Greeting window, enter the message that will be sent automatically when the user first opens the dialog with the community;
7\) Press "Save";
8\) Navigate to "Bot settings" in the menu on the right;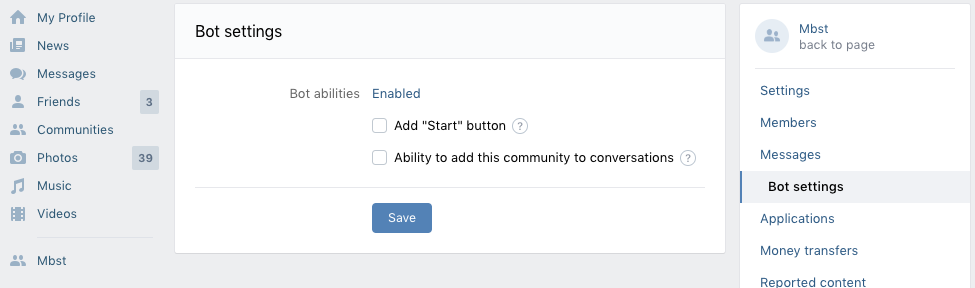
9\) Enable Bot abilities;
10\) Press Save;
11\) Go to Settings section;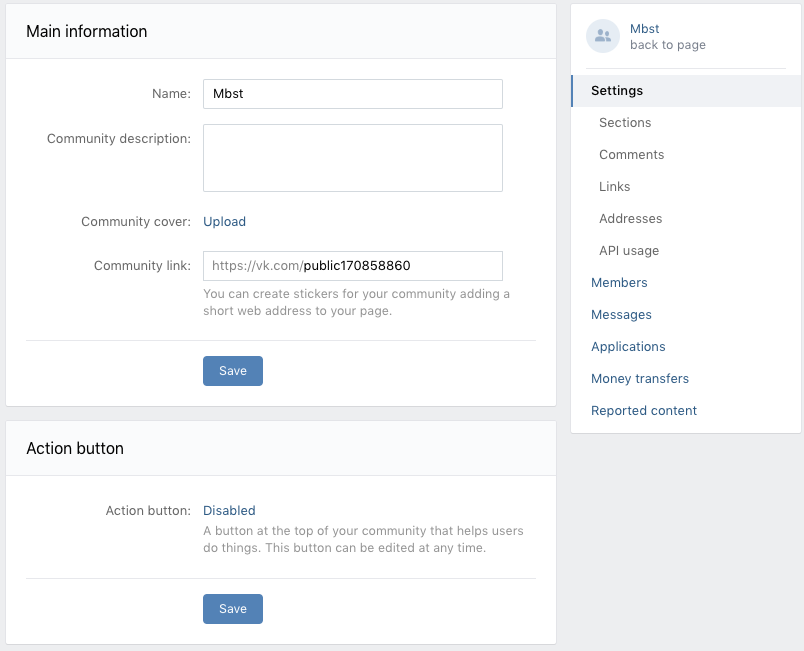
12\) Go to Api usage;
13\) On the "Access tokens" tab, click the "Create token" button;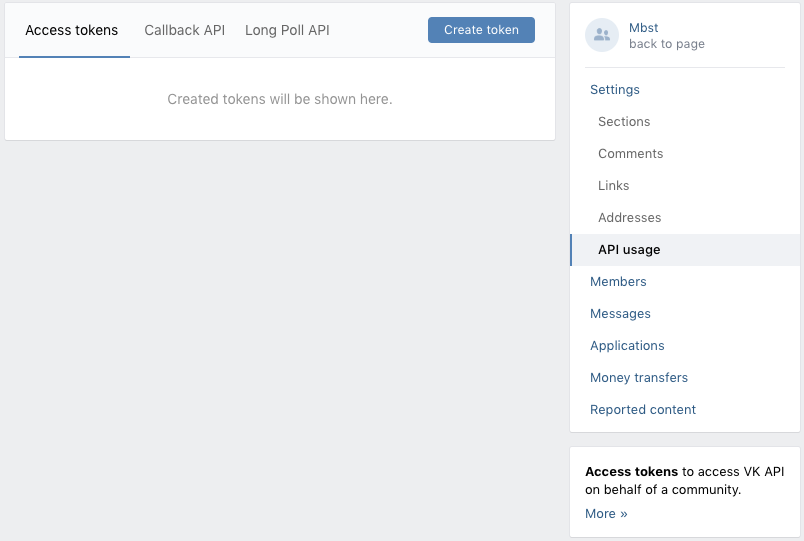
14\) Define the rights for the new access token and click "Create";
15\) Confirm your action with the form popped up;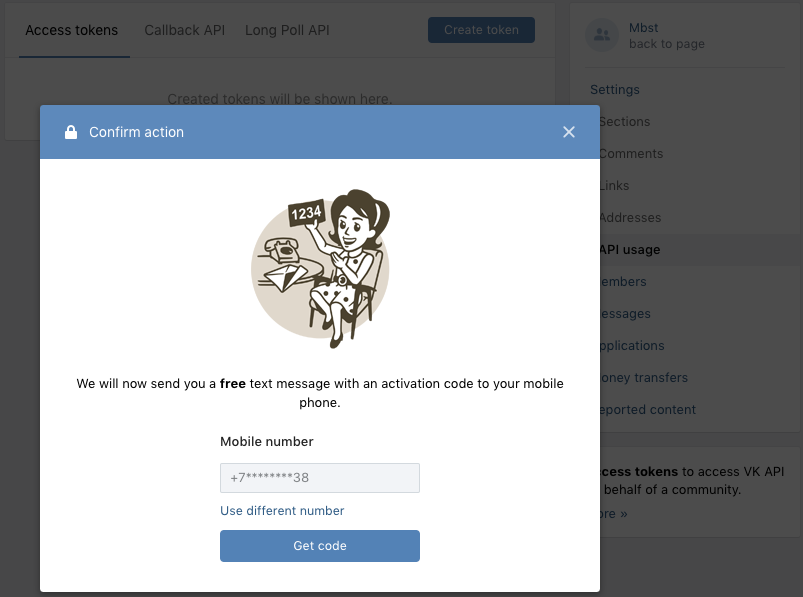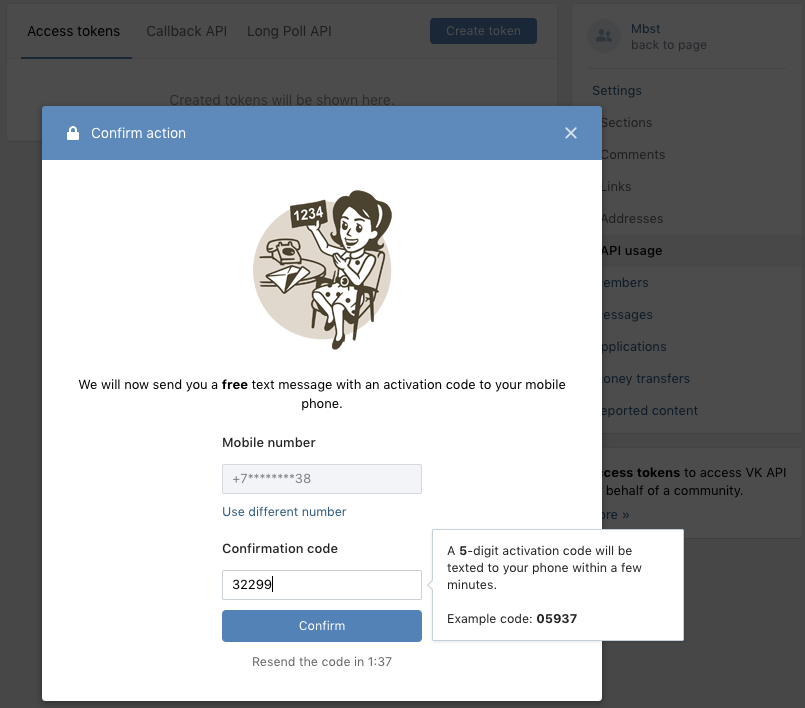
16\) If these steps are successfully completed, the "Access Token" will be created to access your bot via the API. Copy the "Access Token" to the clipboard;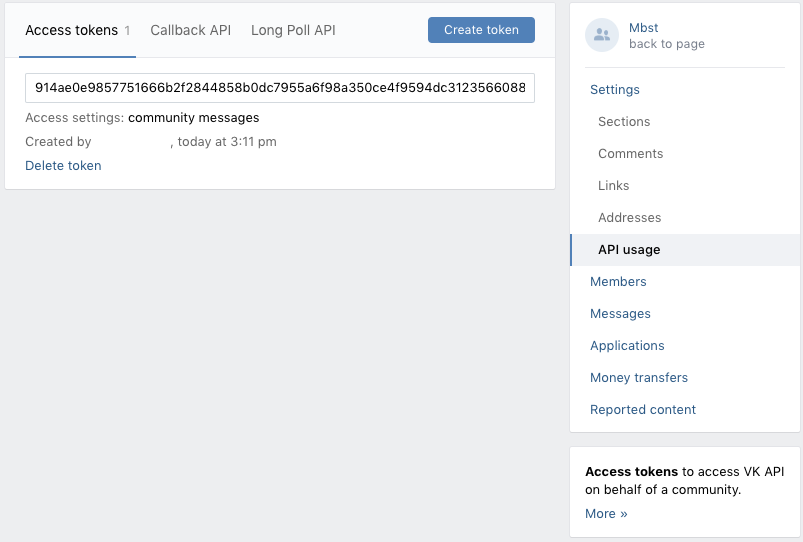
17\) Go to the VK bot setup page on the Mobsted platform;
18\) Fill in the “Bot Name” fields (enter your bot's unique identifier - ”group\_id”) and “Token” and click “Save”;
19\) Copy the "Webhook-address" to the clipboard;
20\) Go to the VK bot setup page, the "Callback API" / "Event types" tab;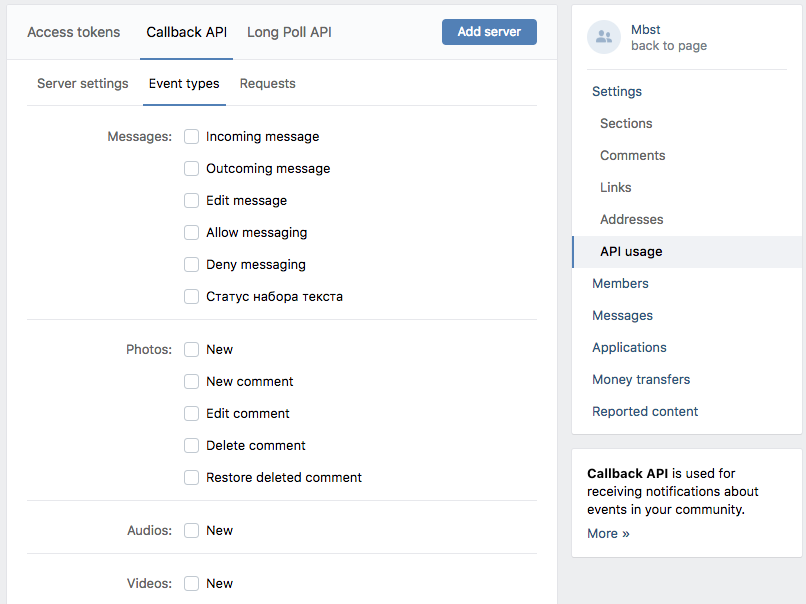
21\) In the list, check the checkboxes: Incoming messages, Outgoing messages, Edit messages, Add photos, Add video; Adding entries to the wall; Add a comment on the wall; add discussion; Joining the community; Leaving the community;
22\) Go to "Callback API" / "Server settings" tab;
23\) In the “Address” field, enter the Webhook address from the Mobstead page, select 5.87 in the drop-down menu in the “API Version” menu, enter text in the “Secret key” field (any string up to 50 characters) and click the “Save” button (under this field );
24\) Copy the confirmation string to the clipboard (highlighted green on the screenshot);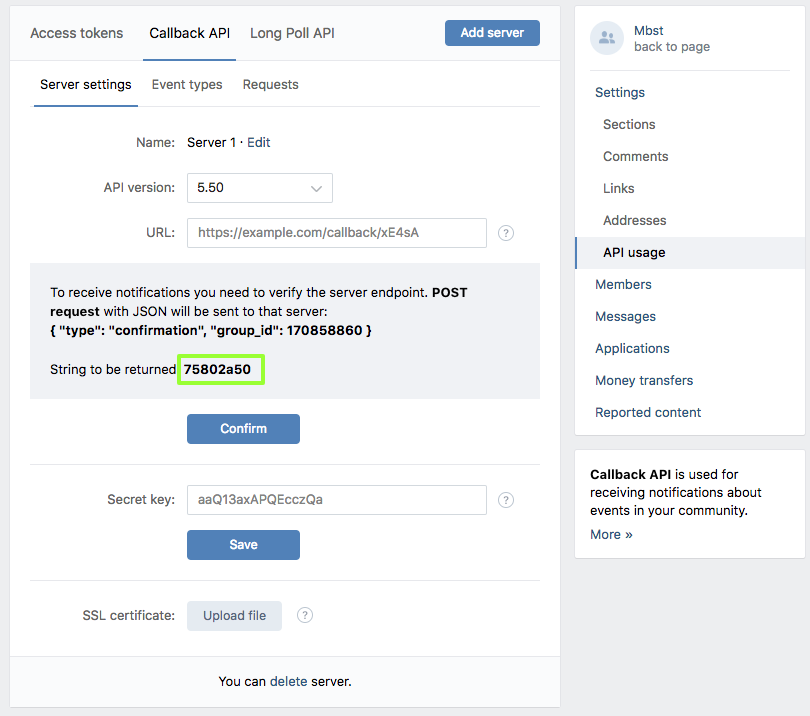
25\) Go to the VK bot setup page on the Mobsted platform;
26\) In the “Answer code Bot Confirmation” field, enter the line to confirm, in the Bot Secret field, enter the data from the “Secret key” field;
27\) Press "Save";
28\) Go to the "Callback API" / "Server settings" tab and press "Confirm";
29\) After the confirmation click "Add server".
Your VK bot is ready to use.
---
# Agent Instructions
This documentation is published with GitBook. GitBook is the documentation platform designed so that both humans and AI agents can read, navigate, and reason over technical content effectively. Learn more at gitbook.com.
## Querying This Documentation
If you need additional information that is not directly available in this page, you can query the documentation dynamically by asking a question.
Perform an HTTP GET request on the current page URL with the `ask` query parameter:
```
GET https://mobsted-2.gitbook.io/knowledge-base/messengers/intro-placeholder/set_up_vk_bot.md?ask=
```
The question should be specific, self-contained, and written in natural language.
The response will contain a direct answer to the question and relevant excerpts and sources from the documentation.
Use this mechanism when the answer is not explicitly present in the current page, you need clarification or additional context, or you want to retrieve related documentation sections.